 Champion
FFPR26/44KB
Single Tank Rack Conveyor with Front Feed PrewashChampion FFPR26/44KB Conveyor Dishwasher
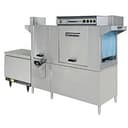
The Champion FFPR26/44KB is a single tank rack conveyor dishwasher with a 26" front feed prewash and an electric booster (40°F/22°C rise). Now out of production, it holds a 180°F/82°C final rinse at 20-22 psi. PartHubz supplies its manual and replacement parts.
Champion FFPR26/44KB
498 compatible parts available
Genuine OEM Parts
Sourced from the manufacturer
Canadian Owned
Based in British Columbia
Canada-Wide Shipping
Every province and territory
24hr Quote Response
Answered by a real technician
Manuals & Documents
About the Champion FFPR26/44KB
Overview
The Champion FFPR26/44KB is a single tank rack conveyor dishwasher fitted with a 26" front feed prewash. It was built by Champion, whose technical manual P/N 112844 Rev. I (March 2005) covers the single tank rack conveyor family out of the Winston-Salem, North Carolina and Jordan Station, Ontario operations. Alongside the FFPR26/44KB, that family included the 44KPRB, 54KB, 54KPRB, 44WS, 66WS, KL44 and KL66.
Champion now lists the FFPR26/44KB among its out-of-production product manuals, so keeping an installed machine running comes down to parts availability and disciplined maintenance. The full service and parts manual remains available from PartHubz.
Key Features
- 26" front feed prewash — a prewash section ahead of the main wash tank on a 26-inch front feed machine.
- Electric booster, 40°F/22°C rise — KB models use an electric booster to reach the 180°F/82°C minimum final rinse temperature.
- 18KW booster heater options — P/N 111265 (208V), 111266 (240V) and 111267 (480V).
- Automatic operation — the pumps stop shortly after the last rack leaves the machine while the conveyor continues to run; a STOP button on the control cabinet halts the cycle at any point.
- Chemical ready — 120V signal connections for detergent, rinse aid and sanitizer (sanitizer signal 120VAC, 1 amp max), plus a removable plug for a detergent conductivity cell.
- Serviceable wash chamber — spray pipes remove with a quarter turn, curtains hang on J-hooks, and scrap screens lift out for backflushing.
- Protected heating circuits — non-adjustable high limit thermostats trip at 210°F/99°C and reset with a red button.
Specifications
- Product type: Single Tank Rack Conveyor with Front Feed Prewash
- Front feed prewash: 26"
- Booster: Electric, 40°F/22°C rise
- Booster heaters: 18KW — 208V (P/N 111265), 240V (P/N 111266), 480V (P/N 111267)
- Booster contactor: 60 Amp, 3 pole, 208-240V (P/N 111827)
- Branch fuse, 208-240V: 70A, 600V (P/N 180060); fuse block P/N 108424 prior to S/N 85303, P/N 180171 from S/N 85303 and above
- Supply voltages in the parts schedule: 208-240V, 380V, 415V, 440-480V and 575V, with 240V single-phase (50A fuse, P/N 180175) and three-phase (40A fuse, P/N 180173) builds listed
- Final rinse: 180°F/82°C minimum at 20-22 psi [138-151 kPa] flow pressure
- High limit thermostats: trip at 210°F/99°C; manual red-button reset; bimetal snap design, not adjustable
- Chemical signals: 120V (detergent, rinse aid, sanitizer); sanitizer signal 120VAC, 1 amp max
- Curtains (per manual): standard long 24" x 20-1/4" [610 x 515 mm]; high hood long 24" x 22-3/4" [610 x 578 mm]; standard short 24" x 13-1/4" [610 x 337 mm]; high hood short 24" x 20-1/4" [610 x 515 mm]
- Manual: P/N 112844 Rev. I, March 2005; control panel figure applies to machines from S/N 88503 and above
Installation & Requirements
Before first fill. Remove any foreign material from inside the machine and check that the drains and overflow pipes are operational and sealed. Position the scrap screens on their supports above the tanks. The manual warns not to insert racks before the tanks fill — operating the pumps dry causes pump seal damage and leakage that can result in motor failure.
Plumbing check. After the plumbing and electrical connections are completed, fill the tank and wait 10 minutes, then check all plumbing connections for leaks. Drain the tank and check the drain lines for leaks.
Curtains. Hang the curtains on the J-hooks located in the corners of each section. The short flaps of the long curtains face the load end of the dishwasher, and the longest curtains always go on each end of the machine. Sizes are listed in the specifications above.
Chemical connections. The machine takes 120V signal connections for detergent, rinse aid and sanitizer — the sanitizer signal is 120VAC with a 1 amp maximum load. A removable black plug in the load end side of the wash tank accepts the detergent conductivity cell.
Electrical. The parts schedule covers 208-240V, 380V, 415V, 440-480V and 575V builds, with single- and three-phase 240V variants, so match replacement contactors, fuses and heater elements to the machine electrical connection data plate (P/N 108615). When replacing a heater element, check the kW rating and voltage stamped on the heater flange.
Operation
- Fill the tanks before inserting racks — dry pumping damages pump seals.
- Verify the final rinse before service: pressure must be 20-22 psi [138-151 kPa] and temperature 180°F/82°C minimum. On KB models, confirm the booster thermostat is set to maintain 180°F/82°C.
- The pumps stop automatically shortly after the last rack leaves the machine; the conveyor continues to run.
- The machine may be stopped at any time with the STOP button on the control cabinet. When restarted, items inside the machine are fully washed and rinsed.
- Do not allow racks to remain on the unload dishtable — this could cause the conveyor to jam and damage the machine. The manual recommends a table limit switch to reduce the risk.
- Do not leave water in the tanks overnight.
Cleaning & Maintenance
Every 2 hours of operation (or each meal period)
- Turn the power switch OFF. Remove all scrap screens and scrap baskets (if applicable) and pull the drain lever(s) to drain the water. Clean inside the tanks and flush with clean water; backflush scrap screens until clean. Do not strike screens against solid objects.
- Remove the spray pipes with a 1/4 turn counterclockwise and take out the end plugs. Flush the pipes and nozzles until clean, replace the end plugs, verify the rubber seals are in place on the manifolds, and reinstall with a 1/4 turn clockwise.
- Remove and clean the curtains; hang them off the dishtable to dry. Leave the doors open between operations to allow drying.
- Verify the final rinse nozzles are clean and free of internal hard water deposits; clean the orifices with a small paper clip. Consult the chemical supplier for the proper deliming chemical.
As required
- Check temperature and pressure gauge readings.
- Inspect the machine and check the pump motor for leaks around the shaft.
- Check chemical supplies and refill as necessary.
Weekly
- Inspect all water lines for leaks and tighten joints if required.
- Clean detergent residue from the exterior and check the drain/overflow tube for leaks.
- Clean accumulated scale from the heating element and closely inspect each spray arm for blockage.
- Straighten a paper clip and use it to clear each rinse nozzle.
The manual notes that components not regularly cleaned and flushed will clog and become inoperative, and that intervals should be shortened under abnormal working conditions, hard water, or multiple shift operations.
Troubleshooting
Insufficient pumped spray pressure
- Clogged pump intake screen or clogged spray pipe — clean.
- Scrap screen full — must be kept clean and in place.
- Low water level in tank — check the drain and overflow tube.
- Pump motor rotation incorrect — reverse the connection between L1 and L2 in the control cabinet (three phase only).
- Defective pump seal — contact a service agent.
Insufficient or no final rinse
- Faulty pressure reducing valve — clean or replace.
- Improper setting on the pressure reducing valve — set flow pressure to 20-22 psi [138-151 kPa].
- Clogged rinse nozzle and/or pipe — clean with a paper clip or delime.
- Improper water line size — have the installer change to the proper size.
- Clogged 'Y' strainer — clean or replace.
Low final rinse temperature
- Low incoming water — check the booster and confirm the thermostat is set to maintain 180°F/82°C; check the valve is clean and operating.
- Defective thermometer — check for proper setting or replace.
Poor washing results
- Detergent dispenser not operating properly, or insufficient detergent — contact the detergent supplier.
High limit trips
- The red reset button pops out when the temperature exceeds 210°F/99°C. Press the red button in to reset, then determine the cause of the high temperature condition. The high limit thermostat is a bimetal snap design and is not adjustable.
The troubleshooting chart also lists a defective solenoid valve — check or replace.
Applications
As a rack conveyor with a front feed prewash, the FFPR26/44KB was aimed at high-volume dish rooms that pass rack after rack through the machine — hospital and institutional cafeterias, banquet operations, schools and large restaurants are the typical settings for this class of equipment. The prewash section gives heavily soiled racks a first knock-down before the main wash tank, and the single tank layout keeps the footprint more compact than the two-tank machines in the same manual family. Because the model is out of production, it most often appears today as an installed unit needing parts support: curtains, screen supports, magnets, contactors, fuse blocks and 18KW booster heaters are among the components suppliers still list for it.
Champion FFPR26/44KB Specifications
- Model
- FFPR26/44KB
- Booster Rise
- 40°F/22°C
- Manufacturer
- Champion
- Equipment Type
- Single tank rack conveyor dishwasher
- Feed Configuration
- 26" front feed
- Prewash Configuration
- FFPR26
Frequently Asked Questions
Who owns or manufactures Champion dishwashers?+
Is the Champion FFPR26/44KB still in production?+
What does the model number FFPR26/44KB mean?+
What final rinse temperature and pressure does the FFPR26/44KB need?+
Which booster heater element fits this machine?+
How often should I clean the scrap screens and change the tank water?+
The high limit thermostat tripped — how do I reset it?+
Why is my pumped spray pressure low?+
What curtains does the FFPR26/44KB use?+
What chemical connections does the machine have?+
Need Parts for This Model?
Get a free quote for parts, service, or maintenance for the Champion FFPR26/44KB. We respond within 24 hours.
 Champion
View all Champion equipment →
Parts for the Champion FFPR26/44KB
Browse genuine OEM components, gaskets, heating elements, thermostats, and replacement hardware guaranteed to fit this equipment.
 In Stock 360°
Champion 111250 Fitting, Compression, Brass, 1/2' OD x 1/2' MPT
 In Stock 360°
Champion 313359 Bracket, Door Stop
 In Stock
Champion 408124 SPRAYPIPE ASSEMBLY RACK MACHINE
 In Stock 360°
Champion 108441 Hex Nut, M5
 In Stock 360°
Champion 109683 Flange, 4 Hole, Tank Heater Block Off
 In Stock 360°
Champion 111980 Circuit Breaker/Power Switch, 5A
 In Stock 360°
Champion 109751 Heater, 10KW, 208, 3 Tank
DiscontinuedChampion 107922 THERMOSTAT BASE AND COVER 2X3X
 In Stock 360°
Champion 107351 Switch, Toggle, DPDT
 In Stock 360°
Champion 105783 Nipple, 1/2" x 2" Long, Black Iron
 In Stock 360°
Champion 112296 Label, Detergent/Rinse Signal, 4 Pole
 In Stock 360°
Champion 112240 Spraypipe Plug
 In Stock 360°
Champion 106013 Lock Washer, Split, 5/16"
In StockChampion 106026 Washer, 1/4 X 5/8 X 1/16SST
DiscontinuedChampion 110809 STARTER MTR OL GV2-M21 W/AUX
In StockChampion 105757 TEE RED 3/4X1/2X1/2 BI
 In Stock 360°
Champion 401487 Vent Stack, 4' x 16'
In StockChampion 317185 INNER PANEL RACK/CC 36I M1
In StockChampion 100917 FUSE ATMR-15 600V ONE-TIME
In StockChampion 111636 BUS CONNECTOR (3POL)
 In Stock 360°
Champion 900734 Stainless Steel Manifold Conversion Kit, Prior to S/N 86424
 In Stock 360°
Champion 107867 Nut, Outlet Pipe
 In Stock 360°
Champion 900739 Pump Assembly Kit, 1HP
 In Stock 360°